
How To Put In/Insert Hearing Aids
February 11, 2025
Hearing aids offer a range of benefits, from helping hearing loss to managing symptoms of tinnitus. However, if you’re new to wearing hearing aids, putting in or inserting hearing aids for the first time can be an overwhelming experience.
People are generally put off by hearing aids because of the stigma around the appearance, or devices being too uncomfortable or difficult to put in/insert.
With a bit of practice, putting in or inserting hearing aids will become second nature. In this article, we’ve put together our tips on how to insert or put in the most common types of hearing aids.
The 4 Most Common Types of Hearing Aids
Hearing aids come in different sizes, shapes, and functions, and choosing the “right” one depends on your unique circumstances. When selecting your hearing aids, your audiologist can help choose the most suitable device based on your hearing loss severity, the size and shape of your ear, preferences, and ease of handling.
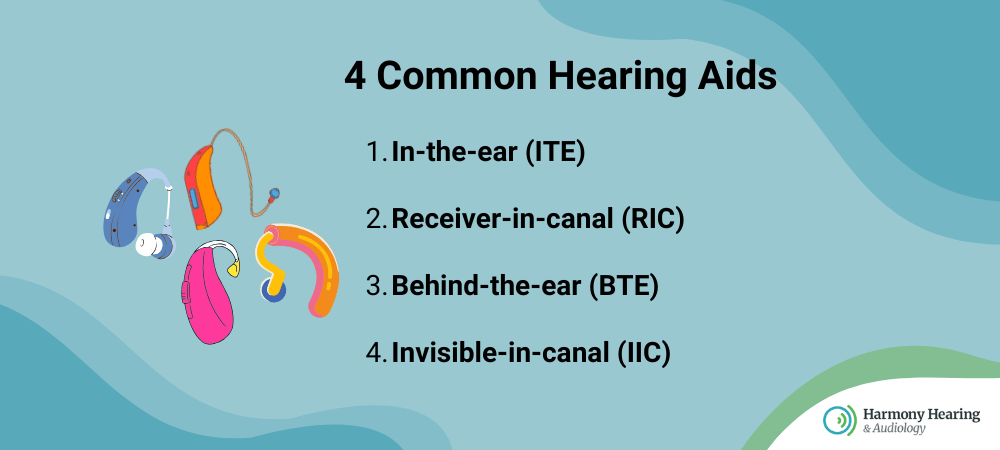
The four most common types of hearing aids are:
- In-the-ear (ITE): ITE hearing aids are customised to the ear and sit in the canal and bowl of the ear. The ITE device can fill either the entire ear (full-shell) or a portion of the bowl of the ear (half-shell).
- Receiver-in-canal (RIC): RIC hearing aids are worn behind the ear and are attached by a wire to a speaker (the receiver) which sits inside the ear canal.
- Behind-the-ear (BTE): BTE hearing devices fit behind the ear and attach to a custom ear mould dome and thin tubing inside the ear canal.
- Invisible-in-canal (IIC): The smallest and most invisible hearing aids available, IIC devices are customised to sit deep inside the ear.

Before Putting In or Inserting Hearing Aids
Learning to put on or insert hearing aids takes practice – the more you do it, the more natural it will feel. We have some general tips that apply to all types of hearing aids to help build good habits and make it easier when putting in or inserting hearing aids.
Tip #1: Don’t confuse your lefts and rights. Most hearing aids have a curve designed for your right or left ear, and using the wrong one won’t just be uncomfortable – it can make putting in or inserting hearing aids almost impossible.
Tip #2: Make sure your hearing aids are clean. It’s good practice to clean your hearing aids regularly, keeping them free from wax that can hinder clear hearing and contribute to bacterial growth.
Tip #3: Stand in front of a mirror. A mirror will help you see more clearly when you’re inserting the hearing aid into your ear. A bonus tip to make the process more efficient is to use your right hand when putting in/inserting your right hearing aid and your left hand for your left hearing aid.
How to Put In/Insert Each Type of Hearing Aid
Each type of hearing aid will require a slightly different technique when putting in or inserting the device. It’s important to note that every brand and style will look a bit different and may require additional steps.
In-the-ear (ITE)
To ensure your ITE hearing aids fit securely in the ear canal and bowl of the ear, follow the steps below.
- Hold the right hearing aid with your right hand, between your thumb and index finger, and point the tip towards your ear canal and the wiring facing away from you. Insert the hearing aid into the ear, twisting it slightly until it sits comfortably.
- Repeat on the left side.
- If the hearing aid feels secure and comfortable – good job, you’re all done!
- If you hear any whistling, this can be an indication that the hearing aid is not inserted correctly, and you’ll need to repeat the first two steps.
Receiver-in-canal (RIC)
The RIC hearing aid device has domes and wires that require slightly more precision. Use the following steps to help.
- Make sure nothing is tucked behind your ears, like glasses, hair, etc.
- Hold the top of the right hearing aid in your right hand, between your thumb and index finger, and slide the hearing aid over the top of your ear and tuck the device behind your ear – just like a pair of glasses.
- At this stage, the wire and dome should be dangling over the front of your ear. Use your thumb and index finger to push the wire gently into your ear canal, using small circular motions to gently push the dome further.
- When the wire at the top of your ear lays flush against your head, this means the dome is properly placed inside the ear.
- Repeat on the left side.
Behind-the-ear (BTE)
BTE hearing aids are similar to RIC devices and have the same process for inserting the hearing device. The difference between BTE and RIC hearing aids is the wire – BTE devices have a thin plastic tube instead.
- Remove glasses or anything that is tucked behind your ears.
- Hole the top of the right hearing aid between your thumb and index finger and, just like you would with glasses, slide the hearing aid over the top of your ear, tucking the device behind your ear.
- Use your thumb and index finder to push the tube that is dangling over the front of your ear and gently push it into your ear. Use small and slow circle motions to push the dome further.
- You’ll know the wire is properly placed when the tube lays flush against your head.
- Repeat on the left side.
Invisible-in-canal (IIC)
IIC devices are the most subtle hearing aid option and have a unique inserting process. The following steps can help to make sure your IIC hearing aid is placed correctly and comfortably.
- Hold the right hearing aid string with your right hand and place the tip of the device into your ear canal.
- Make sure the coloured dot on the shell is facing up.
- Pull your ear back and gently push the hearing aid into your ear canal.
Use the tip of your finger to move the string around, making sure the hearing aid is in the correct place. - The IIC hearing aid has been put in properly if it feels comfortable.
- Repeat on the left side.
